Hi everybody,
I wanted to write some articles about the different stages of workflow, until I realized that I had to talk about the cornerstone of animation first : The pose.
I was recently talking with one of my students who told me that most of the changes they asked him to make concerned his posing.
First of all, it is advisable to work from inside to outside of the character:
1. CONCEPT
Before starting a pose, you must have a clear idea about what you are going to transmit (See CASTING & LAUNCH)
• Message & Inner Thought : Ask yourself what the character should transmit and what he's thinking.
• Characteristics & Personality : Know the character, his age, posture, attitude and personality.
• Anatomy : Analyse his anatomy, his limitations, and which are his rigid and flexible parts, etc…
• Mood : Ask yourself what is his emotional state.
• Action : What is he doing or saying at this time.
• Style : What kind of animation style is required.
2. MOVEMENT
Define on which part of the animation you are working on and ask yourself :
• Kind of Pose : What kind of pose is it (Key pose, Anticipation, Reaction), what is its relationship with the others and how you are going to contrast them.
• Arcs : If you are in the middle of a movement, define the arcs where the several parts of the body are going to pass.
• Offset : According to its speed, which are parts are delayed.
• Reversal : What parts flip and go from an S-shape to a C-shape and vice versa.
Note : Once I have all this information, I usually do a little Thumbnail to capture the essence of the character.
3. LAYOUT
Prepare the set and put the root of the character and the objects in the right place. (See TECHNICAL LAYOUT)
• Perspective : Analyse the scenario and which is the perspective you are going to work in.
• Character Setup : Prepare your character presets according to your taste and the needs of the shot.
• Position : Put the character in place.
• Character Direction : Turn the character towards where he is going to act.
4. FORCES
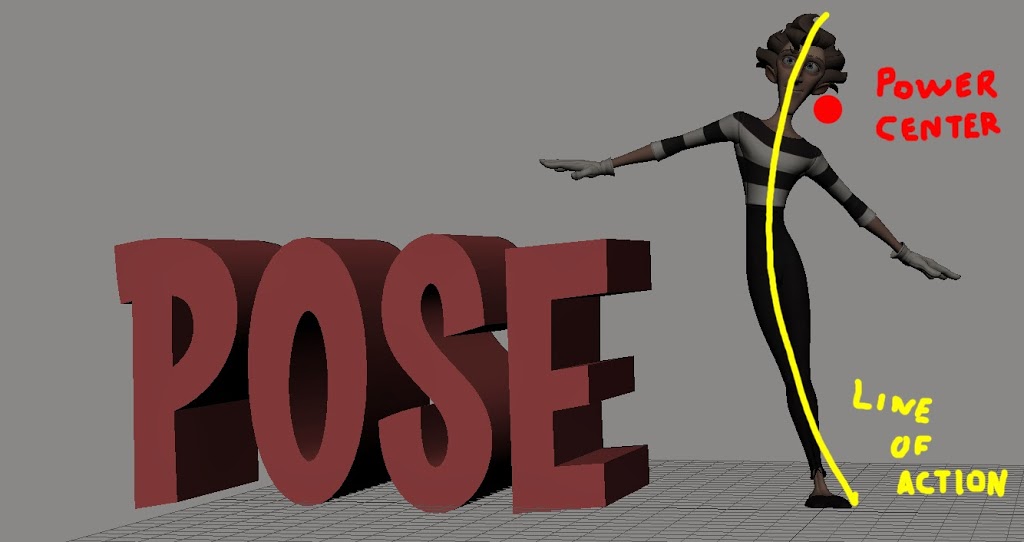
Define the intention of the character through the pelvis and torso.
• Power Center : Define where his energy comes from.
• Force : Define which are the external and internal forces of the pose.
• Line of Action : Draw a line passing through the body to define his attitude.
5. PHYSICALITY
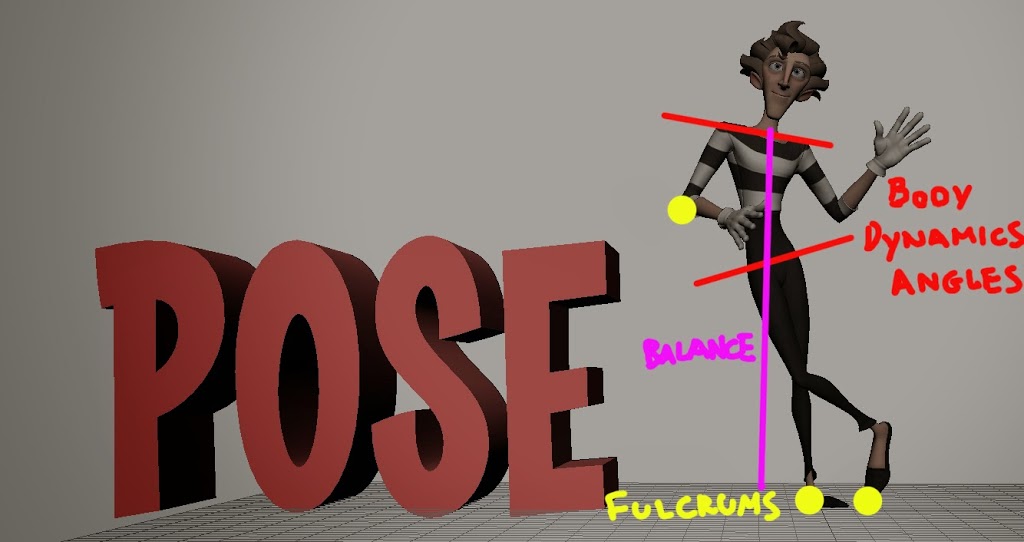
Refine the body dynamics, working on the position of the feet, legs, hip and shoulders.
• Fulcrum : Place the supporting points.
• Weight : Define the distribution of weight.
• Balance : Put the character in balance.
• Body Dynamics Angles : Adjust the angle of chest and shoulders in relation to the hips.
Note : If I want to be sure that my body dynamics works and avoid surprises in spline, I look at it on diferent views.
6. COMPOSITION
Direct the viewer's attention and define the focus, adjusting the body and arms.
• Depth & Planes : Define which parts are going to be on different levels and highlight the depth.
• Volume & Composition : Compose your picture according to the 2 thirds and the triangle rules and check if the pose is not cut on joints.
• Shape & Lines : Work on the shapes to direct the viewer's eye.
• Flow Lines : Check if the lines of force direct the viewer's attention to the center of interest of the pose.
Note : Check if you have kept the spirit of the pose.
7. DESIGN
With the design tools, keep the harmony of the pose.
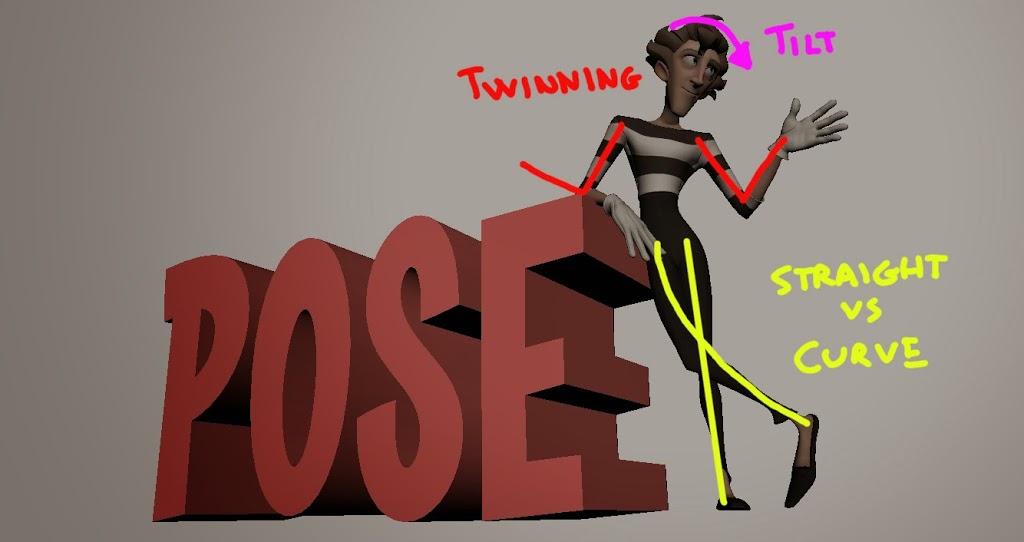
• Body torques and tilts : Play with the rotations of the head and torso to prevent frontality and favor profiles and 3 quarters.
• Twinning : Avoid repetitions and twinnings and search for asymmetries.
• Tangents : Avoid tangents in your pose.
• Straight & Curves : Remember to balance straight lines with curves.
• Visual Rhythm : Check if the pose maintains a visual rhythm.
Note : To see if my works soil pose "flipearla" is look in a mirror.
8. CONTRAST
Try that your pose transmit clearly and simply.
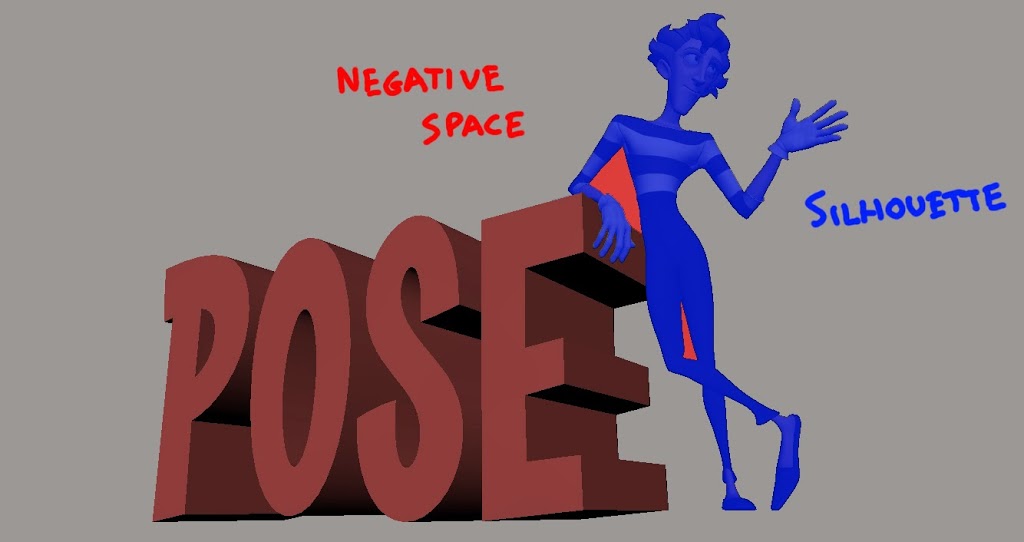
• Silhouette : Work on the silhouette so that it can be understood at first sight.
• Positive & Negative Space : Check if there is a good relationship between positive and negative spaces.
• Inner Silhouette : Work on the elements inside the silhouette.
• Contrast : Contrast forms, lines, masses, colors, details, etc…to support the clarity of your pose.
• KISS : Keep It Simple Stupid! Be sure that the pose is simple enough to be read.
Note : There are plugins that allow you to clearly see the silhouette, or simply default 'lights out'.
9. EXAGGERATE
Do a caricature of the pose.
• Caricature : Exaggerate the concepts in your pose. (Make what is small smaller, and big bigger)
• Tension : Increase the tensions.
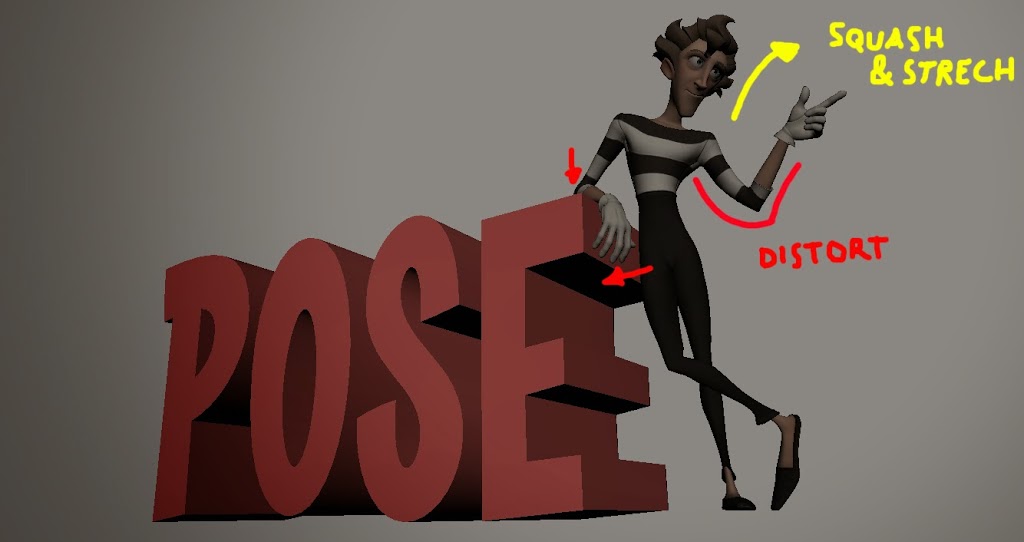
• Squash & Strech : Deform your character using the squash & strech.
• Distort : At that point, you can "fake" your pose to support your concept.
10. ENTERTAINMENT
Put the final details
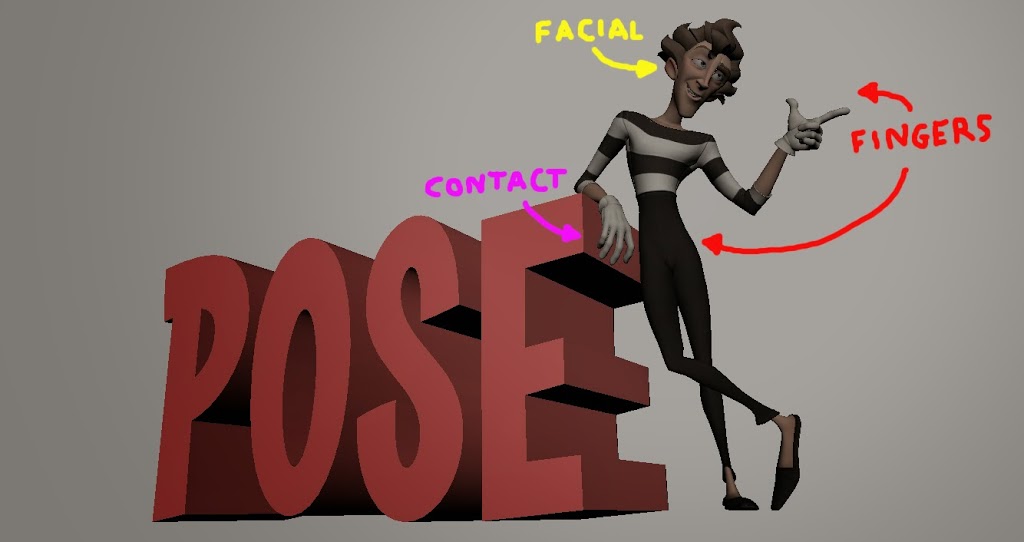
• Hands & Fingers : Work on your hands positions and fingers rotations.
• Eyes : Work the eyes direction as well as overall eyebrows shape.
• Facial : Work your facial to transmit the emotion and the selected phonemes.
• Details & Texture : Use all parts of the body to support your pose.
• Secundary & Subtilities : Work on your secondary according to the motion and put the final details of your pose.
• Contacts : Check the accuracy of your contacts.
Note : Some animators often let facial for a more advanced stage of blocking or the spline.
Once finished, you will have to ask yourself :
• Is transmitting the pose what I had planned?
• Does the pose corresponds to the personality of the character? Are you all 'into character'?
• Do you think the audience can understand how the character feels and what he's thinking, saying and doing?
• Have I ensured that my pose is not "cliché"?
• Does my pose work with the preceding and following ones?
• Is my character well placed on the stage?
• Have I used all the resources to direct the attention to the most important part of the performance?
• Is my character well built and seems to have balance and weight?
• Is my image well composed?
• Is my pose clear and simple and readable at first sight?
• Does my pose have appeal?
• Did I exaggerate enough?
• Did I use all parts of the character to transmit my intention?
• How would another animator do the shot?
If you go step by step and to check all these points, I am sure that you will minimize changes and get close to the perfect pose.
Note : ..
I hope that was usefull…
Keep animating!!!



5 comments “POSE or All you need to know to make a good pose”